Overview
Adeptia Connect is a platform that enables seamless collaboration between businesses. To maintain security and control over who can access the platform, user management is crucial. Admins can invite new users by sending invitations to their email addresses. Once invited, users can accept and register to gain access. Roles, such as "Admin," "User," or "Guest," determine the level of access and permissions granted to each user. To streamline the process of adding multiple users, admins can utilize bulk import functionality, where a list of user information can be uploaded to create accounts efficiently. By effectively managing user invitations, roles, and bulk imports, organizations can ensure that only authorized individuals have access to the Adeptia Connect platform, maintaining its security and integrity.
Inviting a user
A user can register with Adeptia Connect through an invitation only. Therefore, to allow users to access Adeptia Connect, you need to invite a user.
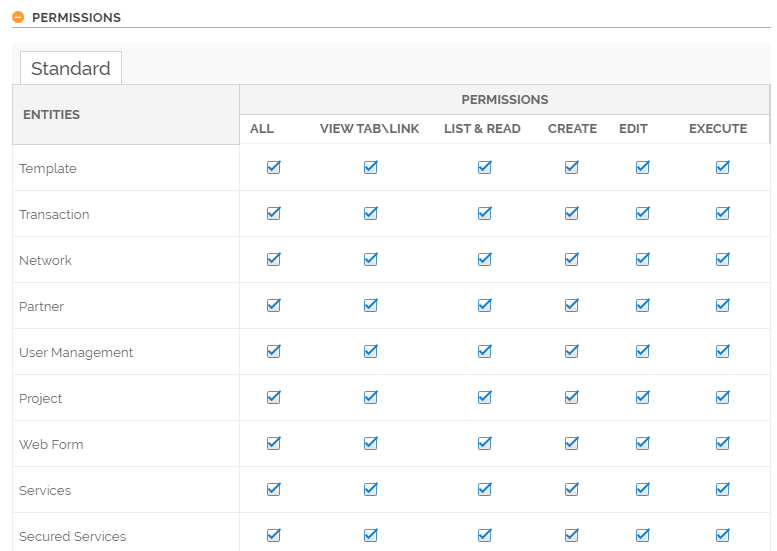
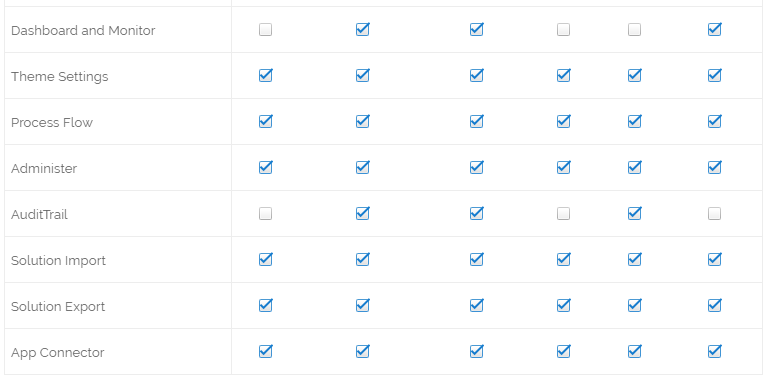
For more information on users' permissions/access, refer to this page.
To invite a user:
Click Account > Users.
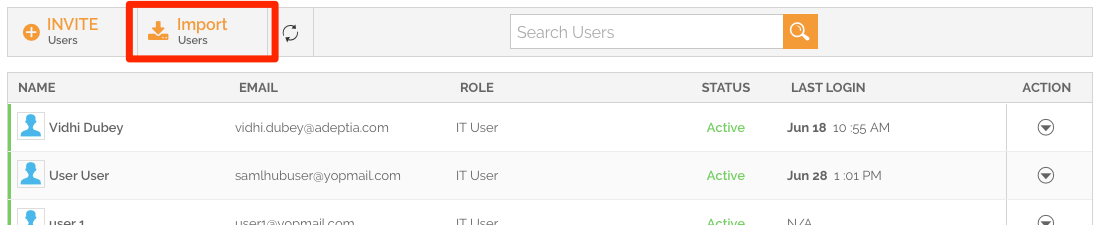
On the Users screen, click Invite Users.
On the Invite User screen, in the Provide User Email text box, provide the email id of the user whom you want to register with and access Adeptia Connect.
You can invite multiple users using their email ids separated by a comma.In the Assign Role field,
Select the Assign Company Only Role checkbox if you want to assign a Company Only type of role to the user, else, complete the steps b and c given below.
On selecting the Assign Company Only Role checkbox, you need to select a Company Only type of role and skip to step 5. If you select multiple Company Only type of roles, you need to select a default role in the Default Role field.In the Company/Partner field, select a Partner.
In the Role field, select the user role(Tenant IT User).
Type the message in the Message text box. The message you type here will be displayed in the body of the invitation email.
In the Reply to Email text box, provide an email id to which the invited users can send their response in reply to the invitation email.
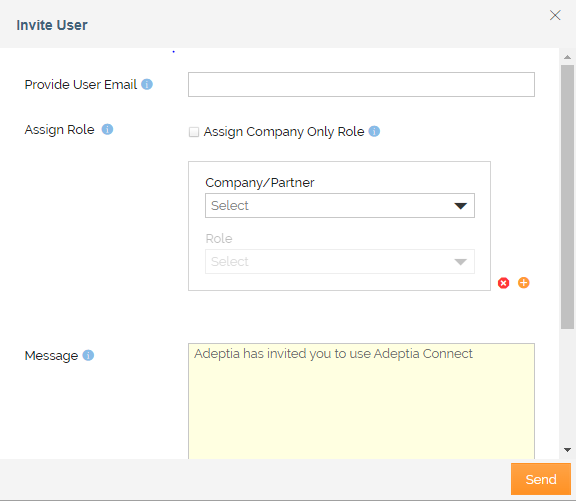
Click Send to send the invitation.
This invites a user.
The invited user will receive an invitation email to activate the account. After the user activates the account, it gets listed in the users section with an Active status.
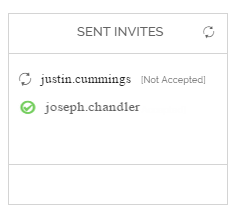
You can check the status of the invitation sent to the users from SENT INVITES panel on the Users manage screen. All the accepted invitations are marked as and unaccepted invitations are shown as Not Accepted.
If due to some reason the invitation email is not received by the user, you can resend the email.
To resend the invitation, in the SENT INVITES panel, click corresponding to the user who has not received or has not accepted the invitation. In the Invite User window, click Send to resend the invitation.
Adding Bulk Users
Instead of adding users manually one at a time, a user (Sys Admin, IT User, and Partner IT User) can add multiple users in one go through bulk import. To do this, the user needs to use a CSV (comma-separated values) file that contains the users' data.
Importing bulk users
Steps to add bulk users:
Click Account > Users.
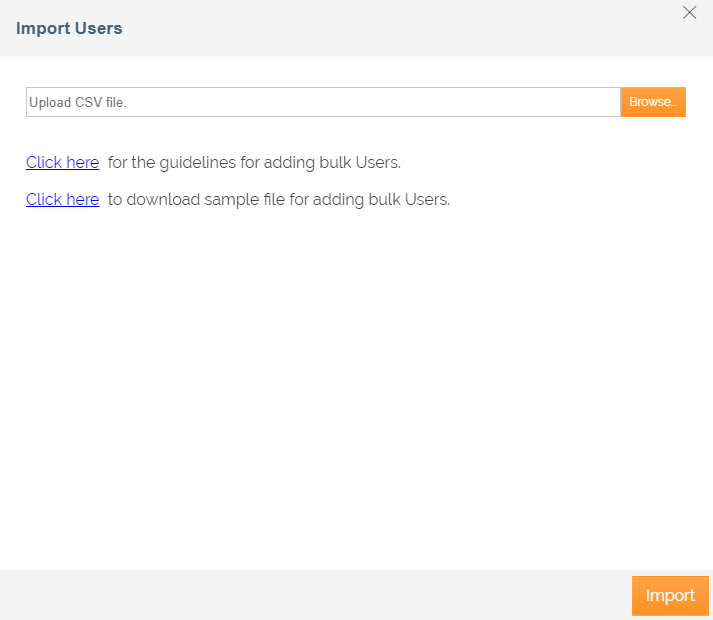
On the Users screen, click Import Users.
On the Import Users screen, follow the next set of instructions based on your role type.
If you are a Sys Admin or Tenant IT user,
Select the following:
For Partner if you want to import Partner users.
Click Browse, and upload the CSV file containing the Partner users' details.
For more information on the CSV file format, refer to this section.
Click Import.
On the Users screen, the Processing notification shows that the users are being added. You can notice the increased count in the Users section on the left side of the screen. You can click(refresh) to see the users being added.Added users can be seen in Active state on the Users screen.
For Publishing Automation
We need to create custom roles for a sysadmin user and assign this role to a sysadmin account.

Summary
The user management process in Adeptia Connect encompasses the invitation of users and the bulk addition of multiple users. To invite users, one must navigate to the Users section under Account and send invitations by providing the respective email addresses and assigning the appropriate roles. Additionally, it is possible to customize the message in the invitation and specify a reply-to email address. Once the invitation is dispatched, the user will receive an email to activate their account. Following activation, they will appear in the Users section with an active status. The system allows for monitoring the status of invitations and provides the option to resend them if necessary.
For the bulk addition of users, Adeptia Connect facilitates the importation of user data via a CSV file. To execute this, navigate to Users and select Import Users, then upload the CSV file containing the user details. The system will process the import, and once completed, the newly added users will be listed as active in the Users section. This method effectively streamlines the management of both individual and bulk user registrations within the system.
FAQs for User Management in Adeptia Connect
1. How do I invite a new user to Adeptia Connect?
To invite a new user, go to Account > Users, then click Invite Users. Enter the email address of the user, assign a role, customize the message, and send the invitation. The user will receive an email to activate their account.
2. Can I invite multiple users at once?
Yes, you can invite multiple users by entering their email addresses separated by commas in the invitation email field.
3. What should I do if the invited user doesn’t receive the invitation?
If a user hasn’t received the invitation, you can resend it. Go to the SENT INVITES panel, find the user, and click the resend button next to their name.
4. How do I track the status of invitations?
You can track the status of sent invitations in the SENT INVITES panel. Accepted invitations will be marked, while unaccepted ones will show as Not Accepted.
5. Can I bulk import users instead of adding them one at a time?
Yes, you can add multiple users through bulk import by uploading a CSV file. Go to Account > Users, click Import Users, and upload the CSV file containing the user details.
6. What format should the CSV file be in for bulk importing users?
The CSV file must contain specific user details, following the required format for importing users. Refer to the guide within Adeptia Connect for the exact format requirements.
7. How do I assign roles to users during the invitation process?
When inviting a user, you can assign roles in the Assign Role field. You can choose a Company Only role or select other roles based on the user’s function.
8. Can I edit or remove users once they’ve been added?
Yes, users can be managed through the Users section. You can update their roles or remove them from the system if necessary.
9. How do I ensure my invited users receive a personalized message?
You can type a custom message in the Message field when inviting users. This message will appear in the body of the invitation email.
10. How long does it take for bulk users to be added to the system?
The import process starts immediately after uploading the CSV file. You can track the progress in the Users section, where the number of active users will increase as the process completes.